It’s easy to grow hemp, just like you would a tomato or zucchini. In fact, hemp requires less water than most vegetables, thrives on neglect, and often needs no additional fertilizer. More importantly, it is just as legal to grow hemp in many states as it is to grow a tomato! Want the TLDR version? We highly recommend the amazing videos from the ‘HGTV of Cannabis’, GBL TV. Spoiler alert, I am in some of the videos!You can check out their stellar educational content here.
When Should I Plant My Hemp Seedlings?
As soon as they arrive! Once you place your order, start thinking about where your hemp seedlings will live. Whether it is in the ground or in a container, your seedlings should be planted as soon as they arrive.
What if I Can’t Plant Them Right Away?
Find a place either outdoors on a shaded patio or on a sunny windowsill in your home. Give each of your plants a drink of room temperature water (~2 cups worth) every other day. Please, please, plant your hemp seedlings within 7 days of receiving them. They grow fast and you want to let those roots out to grow!
Where Should I Plant My Hemp Seedlings?
In a sunny location that is protected from strong winds and receives at least 8 hours of direct sunlight. If you would plant a tomato there, hemp will do great! If it is consistently above 90F in the afternoon during the summer, consider a location that gets some afternoon shade especially if growing in a container.
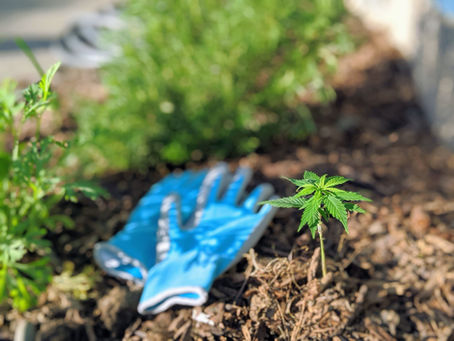
Growing Hemp in the Ground
You can get the biggest, highest yielding plants by growing in the ground.
Step 1. Dig a hole roughly 2’ x 2’ fluffing up the soil and mix in new, high quality, garden soil labeled for vegetables. Every garden store and Lowe’s, Home Depot has many options to fit your budget.
Goal: to create a fluffy space to help get your hemp plant to expand its’ roots.
Tip: If your soil is very hard, rocky, and seems like clay, add in more of the new garden soil, and little to none of the original soil. Just scoop out your soil (set aside) and fill in with the new high quality garden soil labeled for vegetables.
Step 2. Now that you’ve prepared the ‘bed’ for your hemp plant, take your hemp plant and gently loosen the container. Your hemp plant should pop right out, if not, have a little patience and wiggle it some more.
Step 3. Move a little soil aside to create a hole in the ‘bed’, and place your hemp plant into the hole. Keep the soil in the garden level with the soil around your plant.
Step 4. Gently water in your hemp plant, spend a few minutes thinking about how awesome it is that you can grow your own hemp!
Step 5. Check back in on your hemp plant every 2-3 days. If it’s really hot, you will need to water more often.
More Details on Watering Hemp Planted in the Ground
Hemp needs much less water than your average vegetable plant. Over-watering is a common mistake, so try to error on the side of ‘less is more’. The best way to water is to water deeply, and then wait until the top 2” of soil are completely dry before watering again.
Goal: Only water when the top 2” soil are dry. Dig around with your hand and if it feels bone dry, it’s time to water.
Tip: You can purchase an inexpensive water-meter from your local garden store, and that will tell you when it’s the right time to water.
Growing Hemp in Pot
Just like a tomato, hemp can be grown in a large container, in a sunny spot. You’ll need to be a bit more on top of watering, but you can also control the size of your hemp plant and grow it anywhere!
Step 1. The right container is key. If you want to keep your plant smaller, use a 5-gallon container. If you’d like a bigger plant go with a 10-gallon container. Do not go smaller than a 5-gallon container.
Step 2. Fill your container with brand new, high-quality potting soil, right up to the top. Again, just like you would for a tomato plant. Water in the soil, and add a little more on top if needed to make sure the container is filled with about 3” of space from the top.
Step 3. Now that you’ve prepared the ‘bed’ for your hemp plant, take your hemp plant and gently loosen the container. Your hemp plant should pop right out, if not, have a little patience and wiggle it some more.
Step 4. Move a little soil aside to create a hole in the ‘bed’, and place your hemp plant into the hole. Keep the soil in the container level with the soil around your plant.
Step 5. Gently water in your hemp plant, spend a few minutes thinking about how awesome it is that you can grow your own hemp!
Step 6. Check back in on your hemp plant every 1-2 days. If it’s really hot, you will need to water more often. You’ll be rewarded for this little bit of work with a beautiful high-yielding CBD hemp plant!
More Details on Watering Hemp Planted in a Container
Hemp needs much less water than your average vegetable plant grown in a container. Over-watering is a common mistake, so try to error on the side of ‘less is more’. The best way to water is to water deeply, and then wait until the top 2” of soil are completely dry before watering again.
Goal: Only water when the top 2” soil are dry. Dig around with your hand and if it feels bone dry, it’s time to water.
Tip: You can purchase an inexpensive water-meter from your local garden store, and that will tell you when it’s the right time to water.
Tip: During hot weather check your plant every day to see if it needs water.